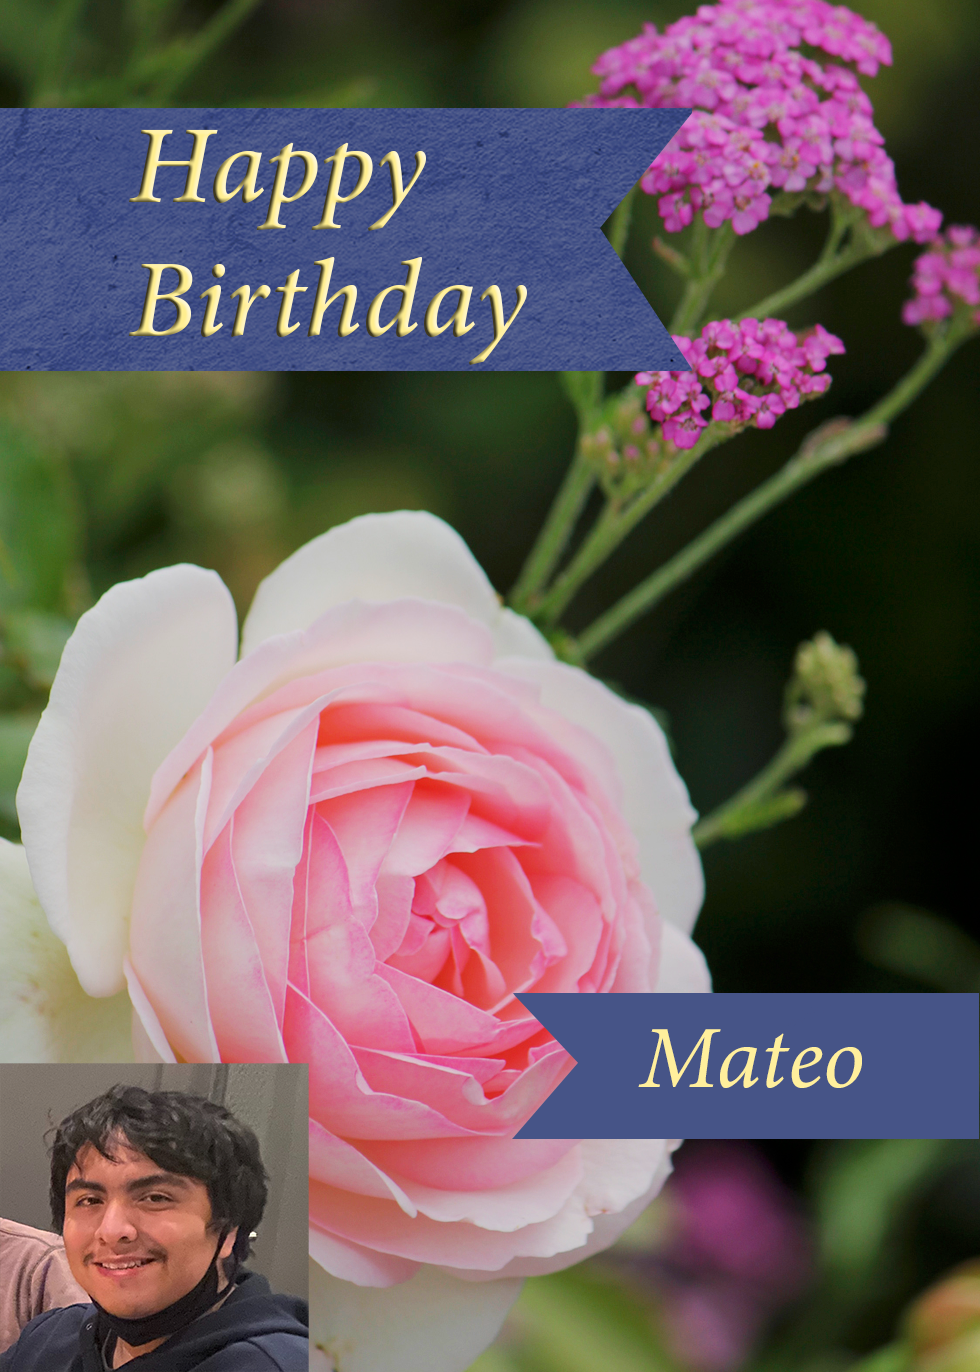
Birthday Card
For our first assignment, I was tasked with making a birthday card. Given a variety of images, I added a window to add text, and touched up on the flower adjusting the brightness and color. To finish it up and add some composition to the photo, I added a picture of myself.
Working with Layers
The next assignment had me working with layers, more than just changing their Default names. I worked on organizing and adjusting layers, adding styles such as Drop Shadows, and blending.

Working with Selectors
Here, I was tasked with using lassos to remove shells and adding them to this box here. In addition, I added shadows to each object, and added text with a Bevel and Emboss layer to make it look like it was indented into the wood of the frame.
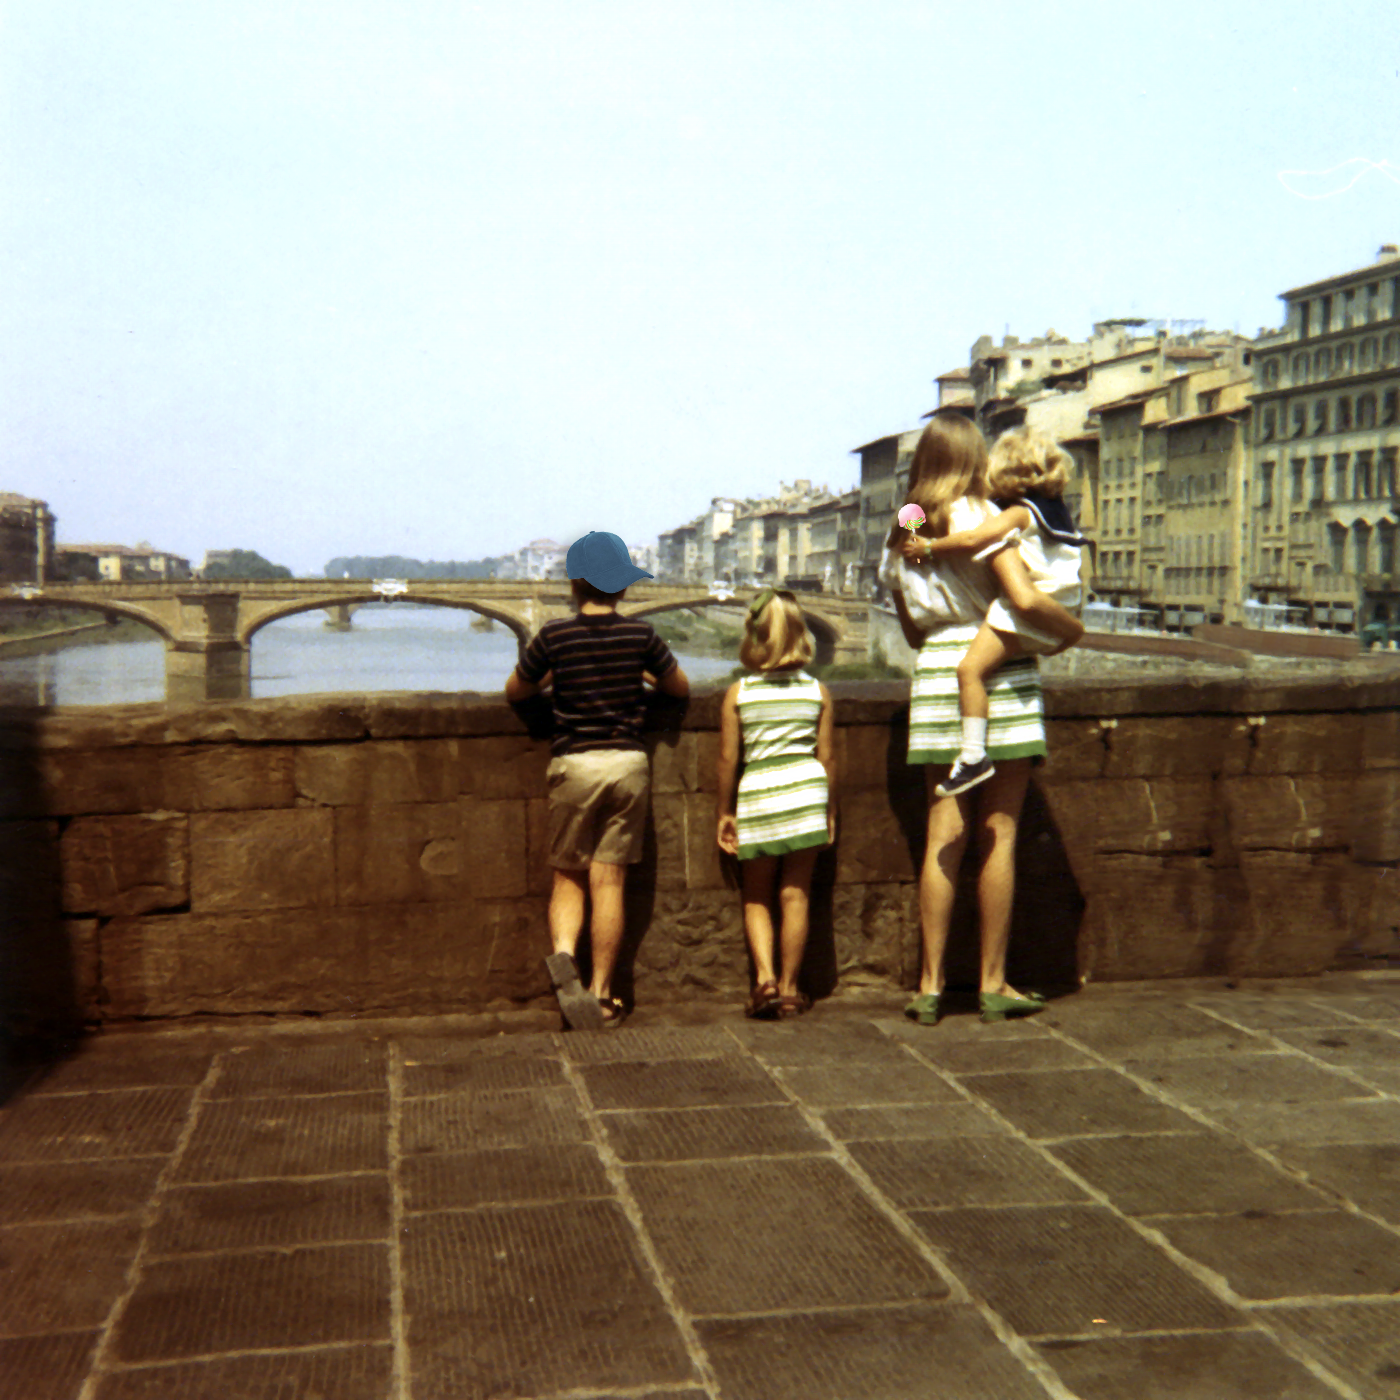
Basic Photo Corrections
Learning about image resolution and size, I cropped an image and used the Spot Healing Brush to remove any creases. used the Clone Stamp Tool to touch up on areas. In addition, I added a hat to one of the children, gave the other one a lollipop, and adjusted the tonal range.
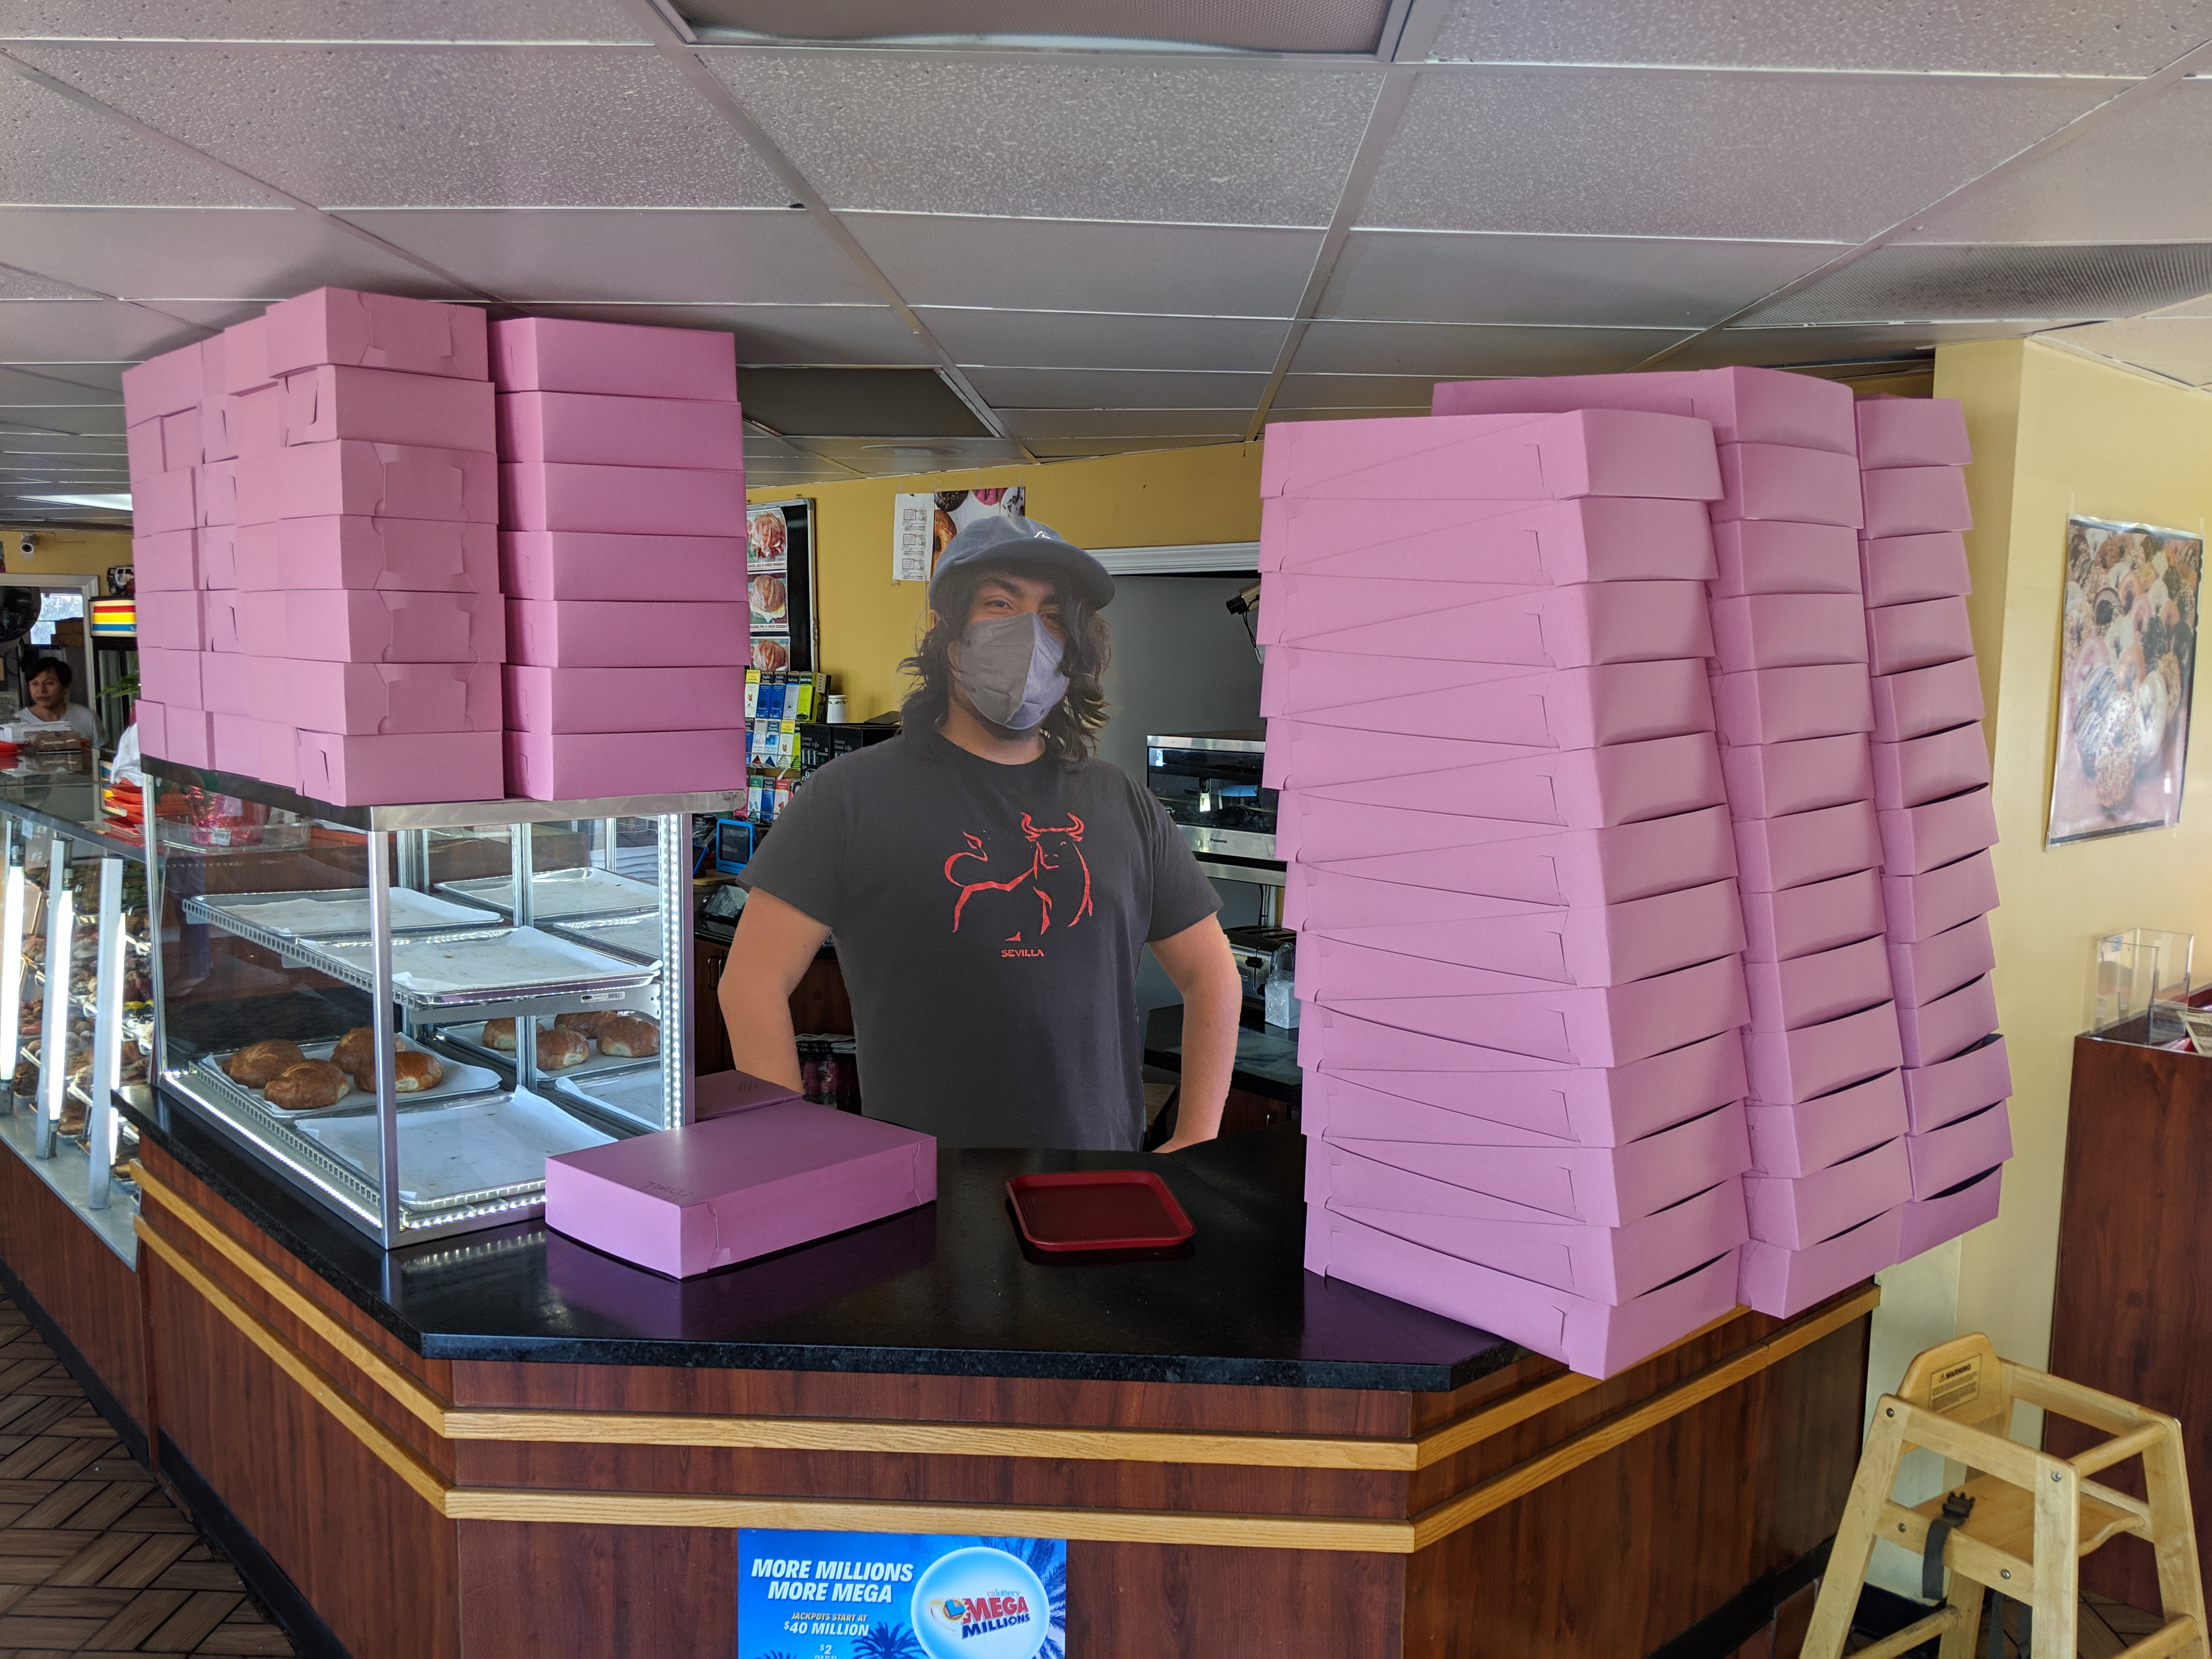
Masking Myself
Familiarizing myself with creating and refining masks, this assignment tasked me with taking a photo of myself and applying it to one of the three backgrounds I was given by my professor. Once I masked my photo, I applied it to a donut shop background, placing myself behind the counter.

Text Clipping
Learning on how to use masks more, I was given a photoshop file with the text "Cañada College", and had to mask two different images to the text: one for the top and one for the bottom text.
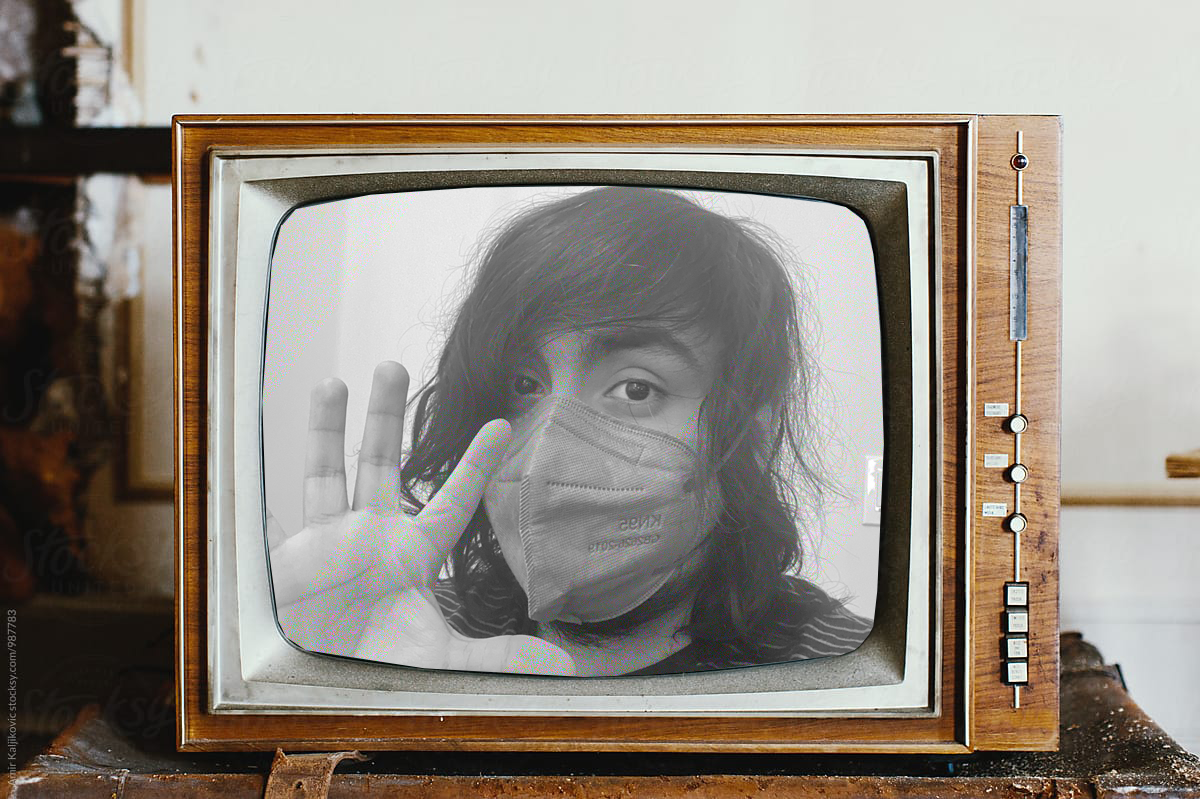
You ought to be on TV!
Using selection tools and masking, I clipped a picture of myself into a TV. I scaled the image to fit the television and added a reflection layer and black and white filter to make it look more realistic.
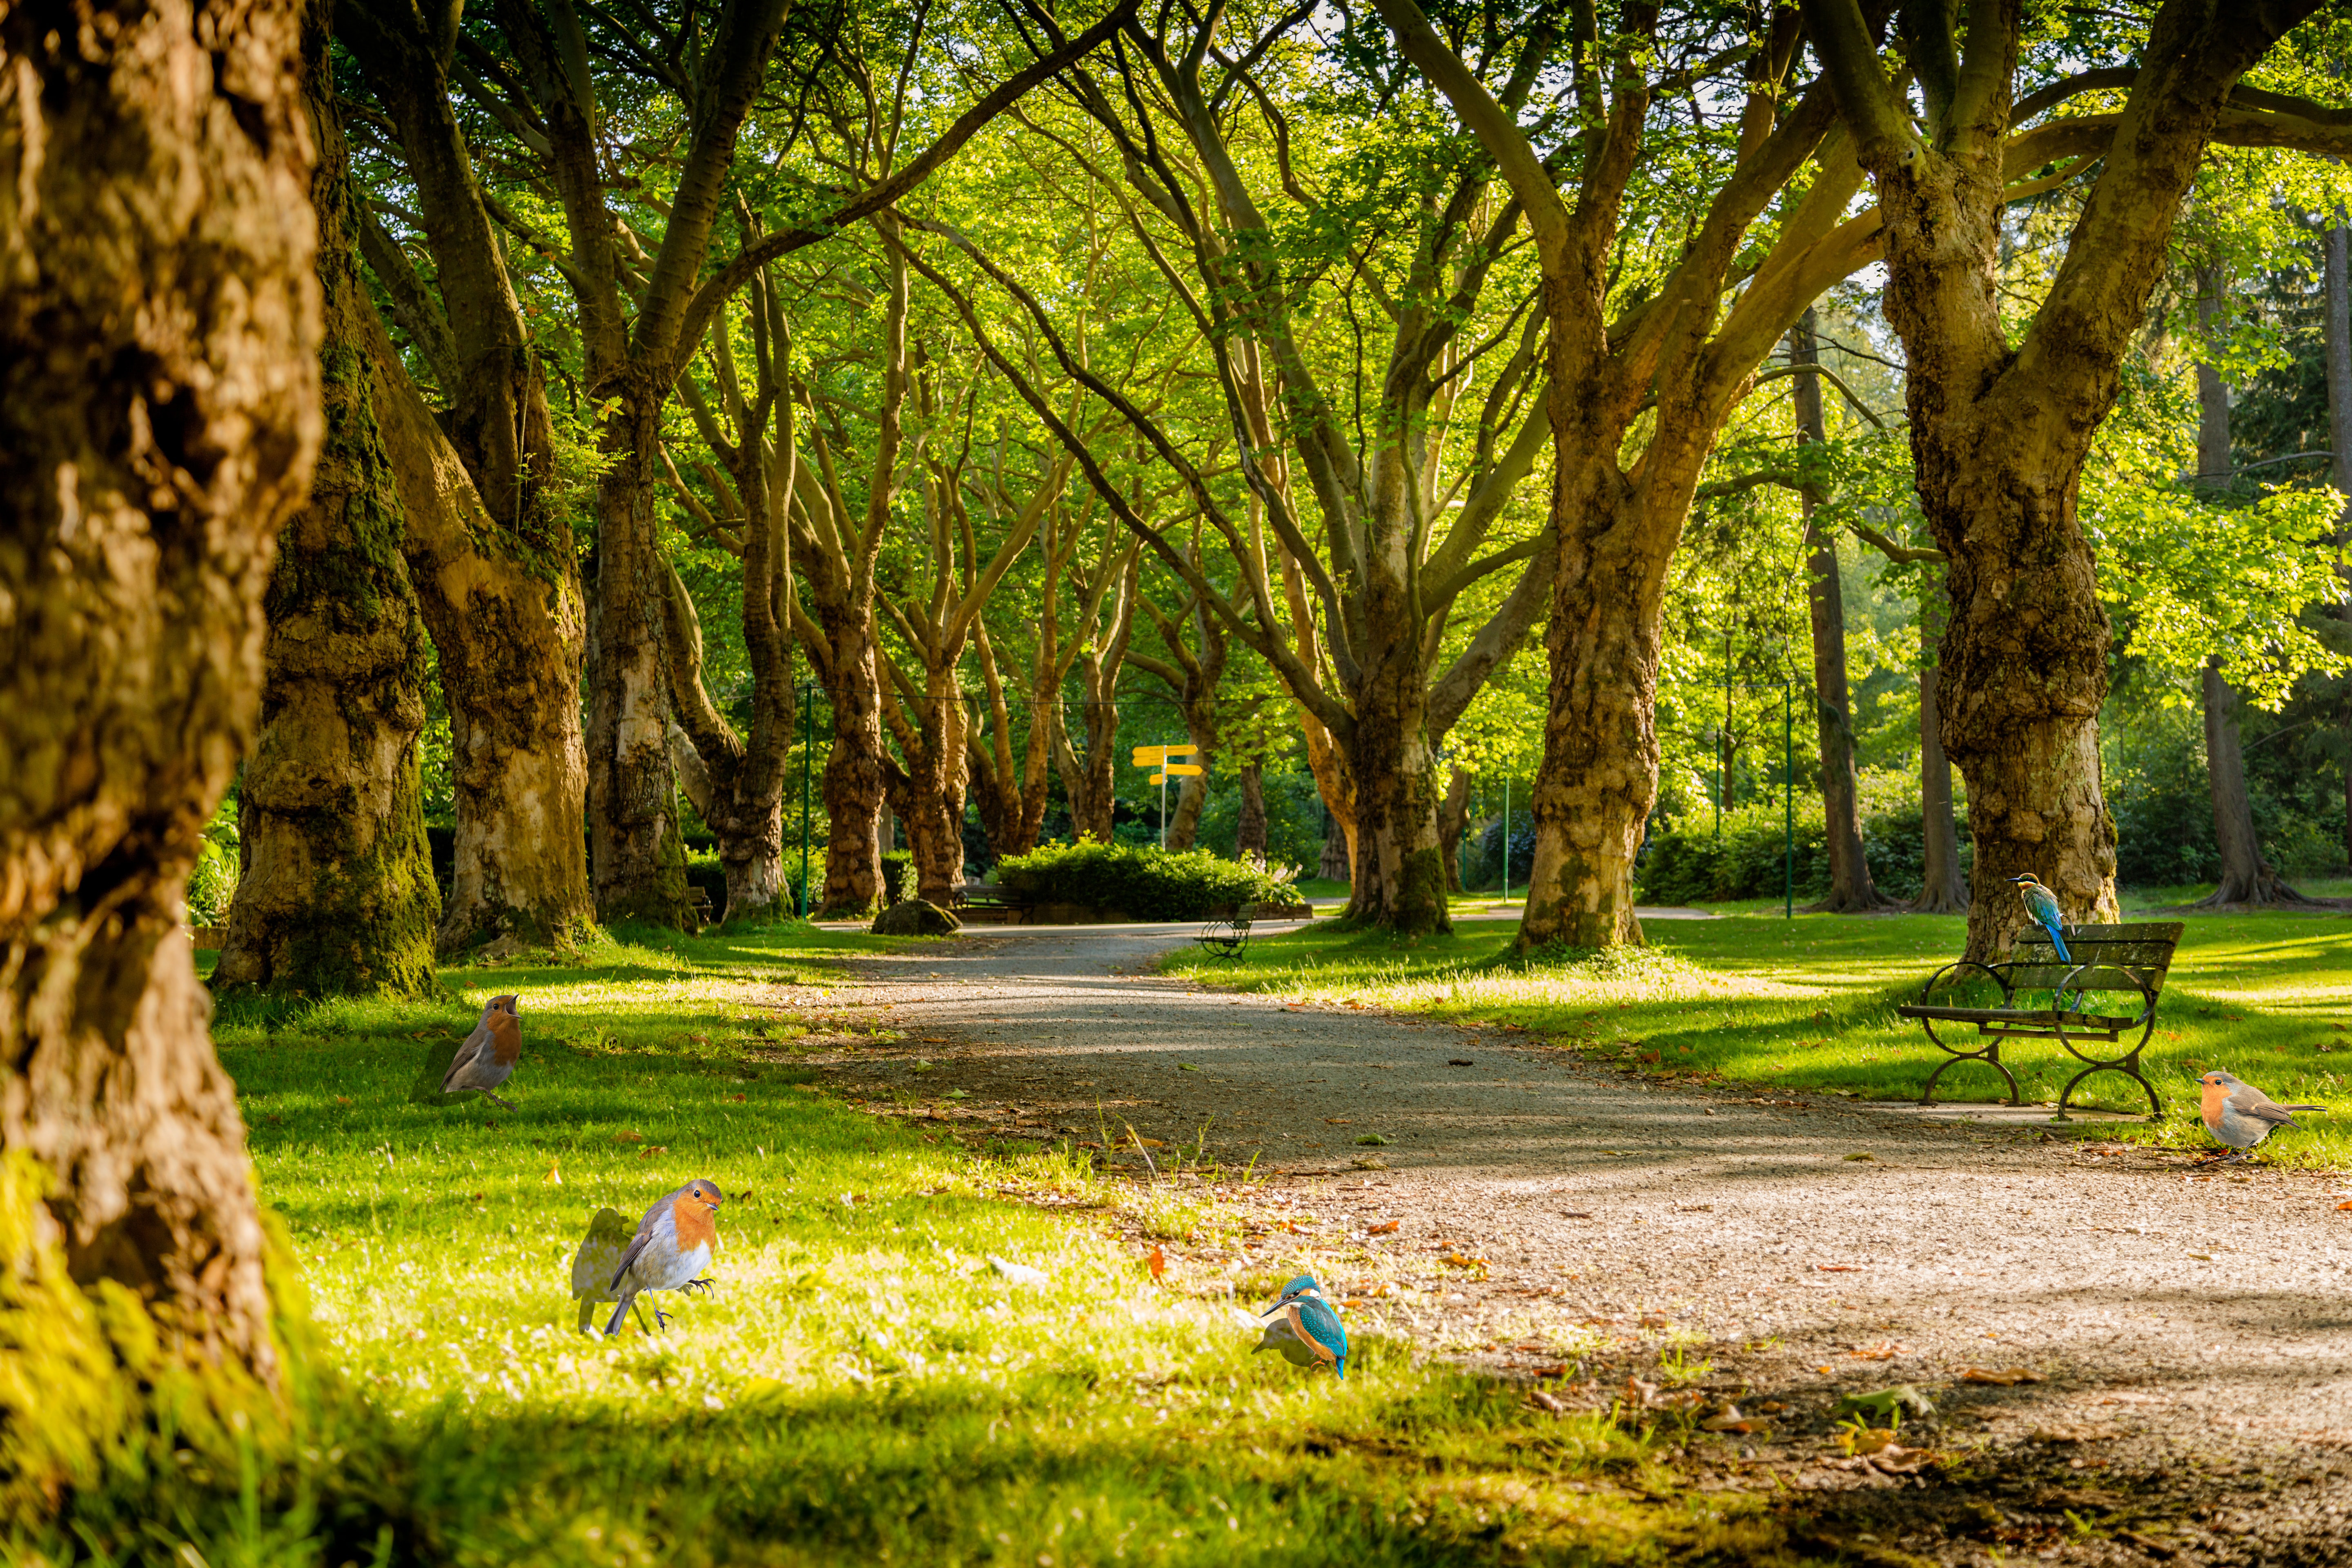
Five-Up
I took five of the same kind of object from five different photographs and put them together in a background as if they belong in the same shot. I used five different pictures of birds, and scaled them down and adjusted the lighting to look like they fit in the camera shot, and added some shadows.
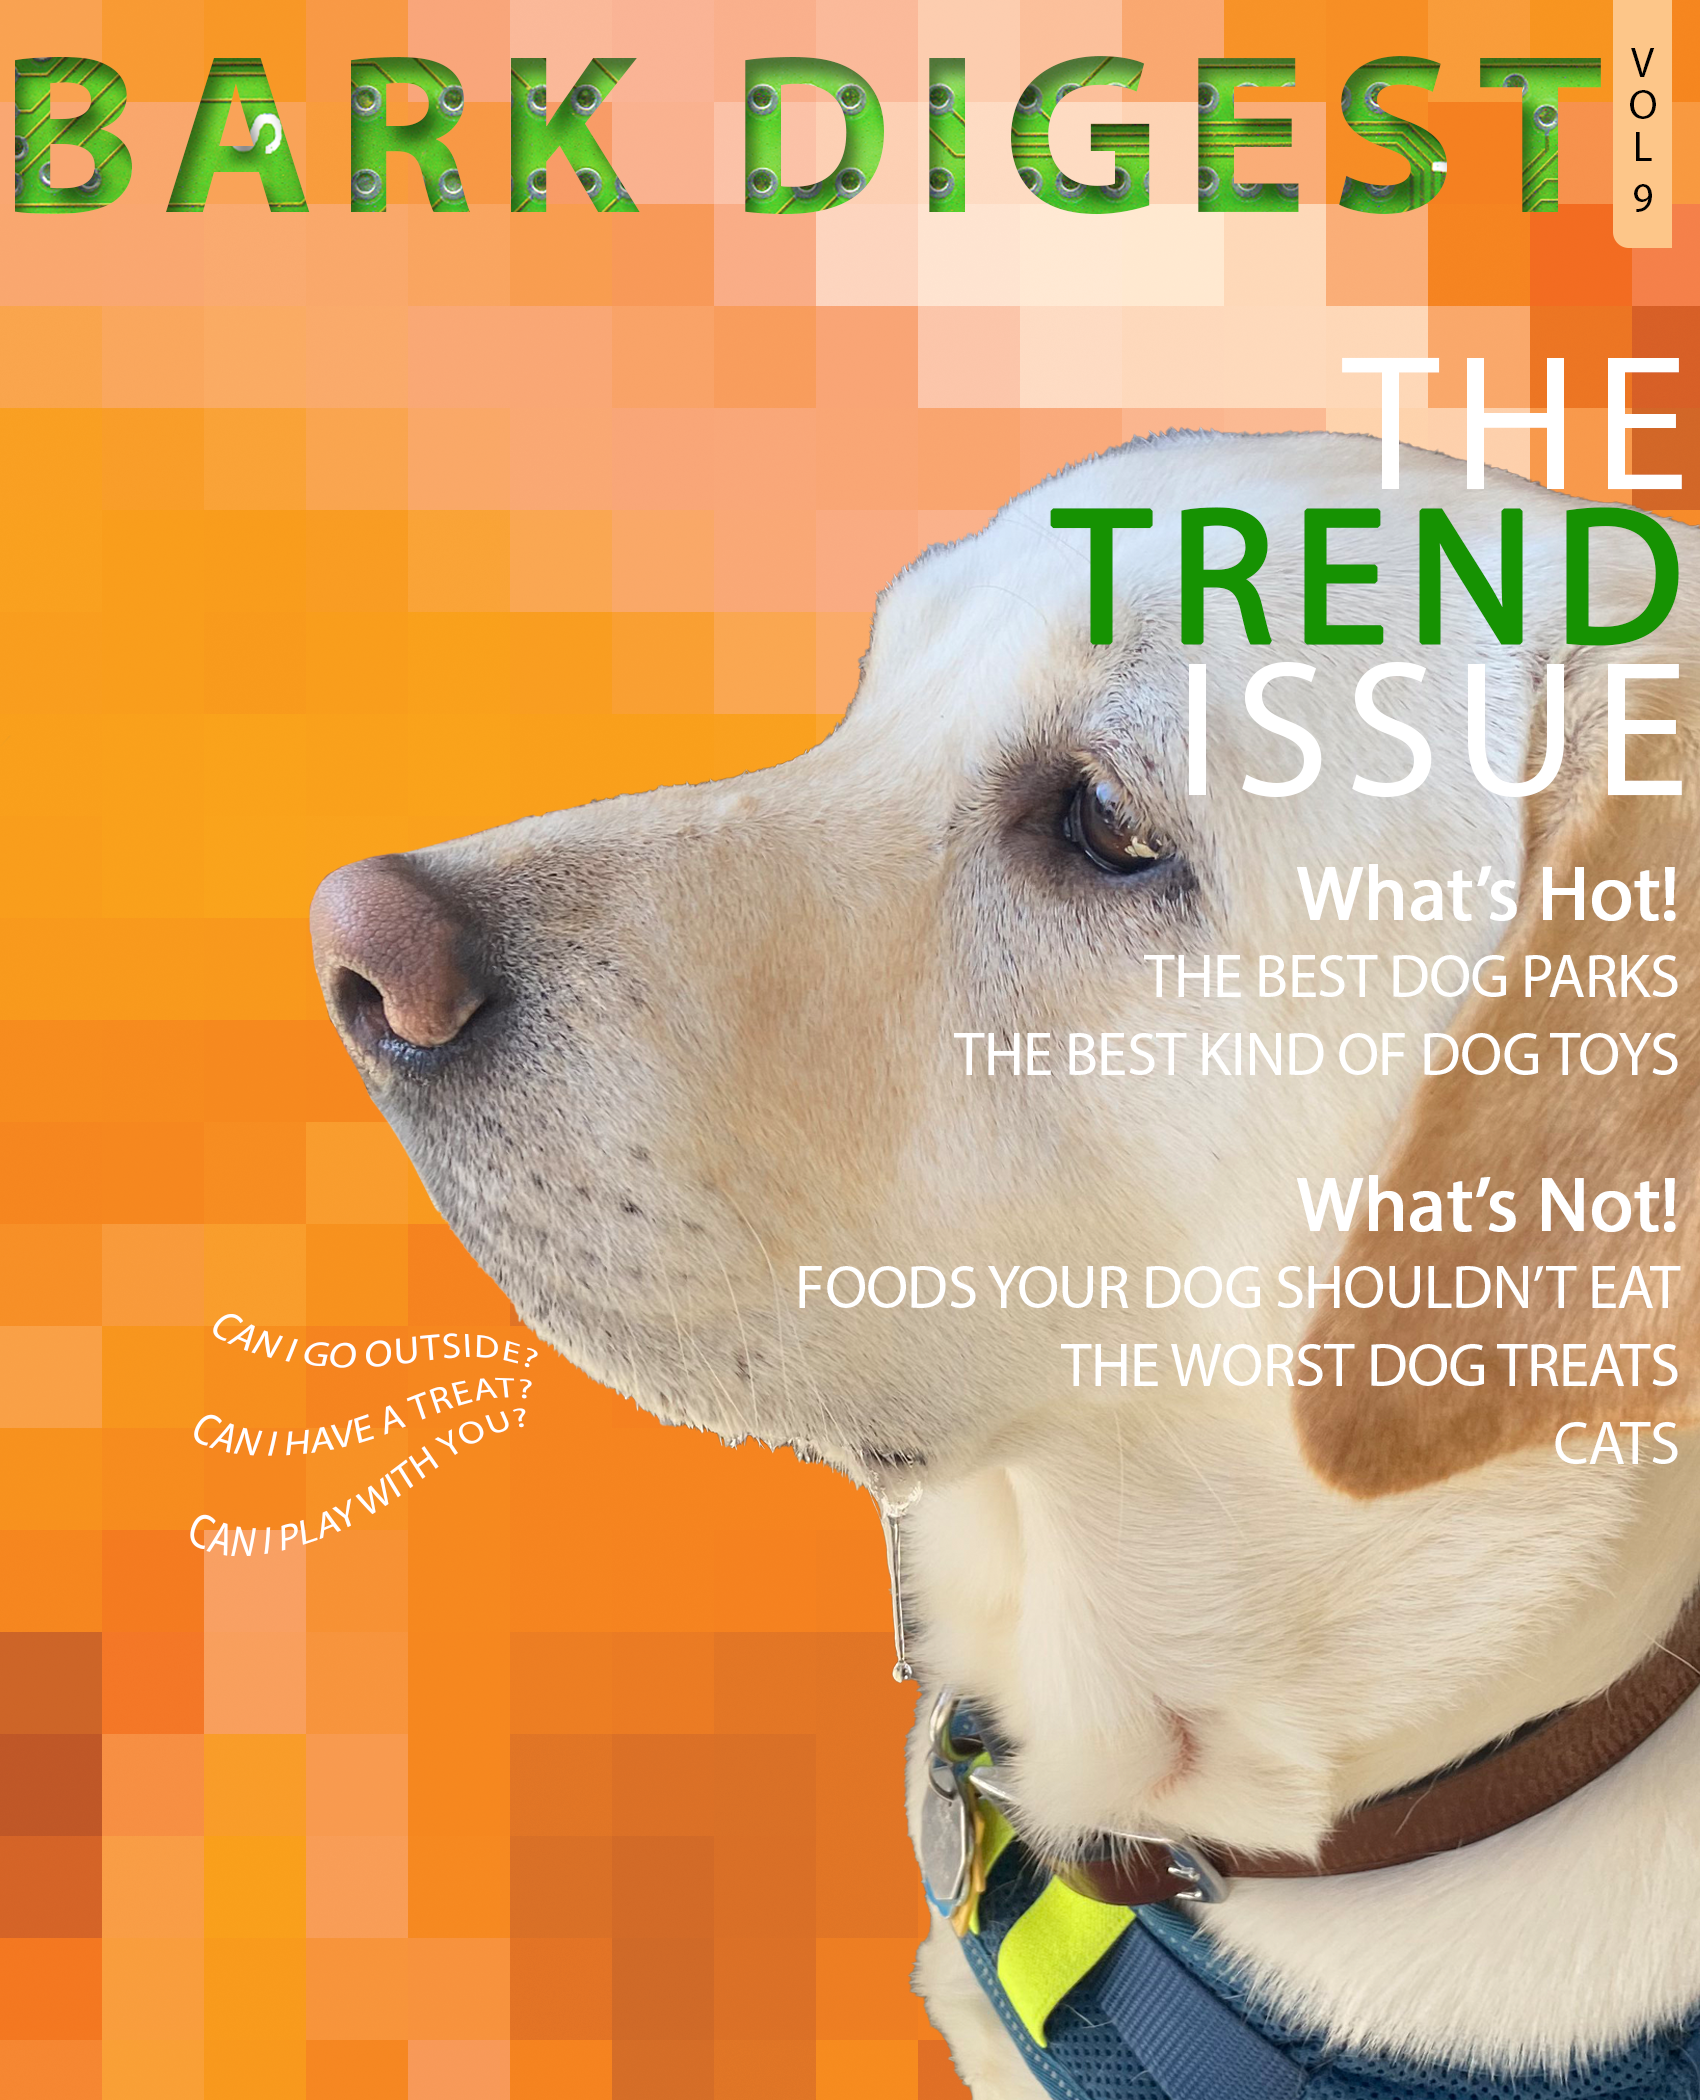
Typographic Magazine Cover
Continuing with masks, I used a photo of my dog, selected the subject, and had it masked and pasted to a magazine cover background. After getting the subject set up, I worked on masking a circuit board to the text, applied text to the side to mimic the magazine cover stories, and worked with text alignments and positions.
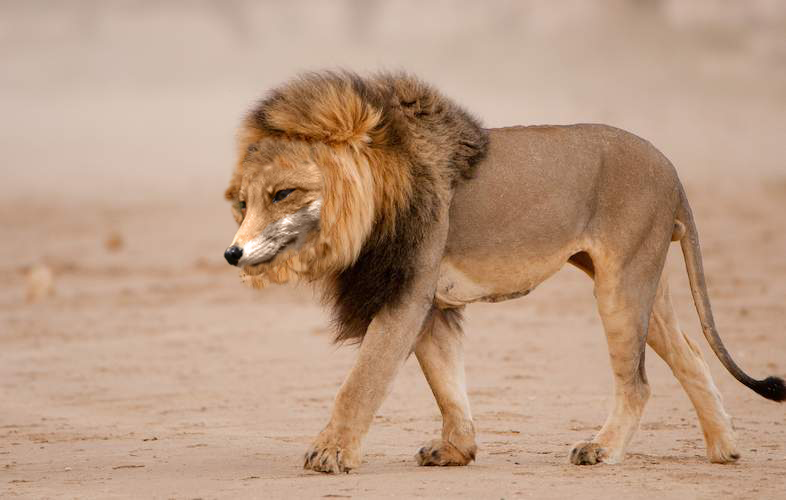
Custom Chimera
I was tasked with making a chimera - a creature with the head of one animal and the body of another. I placed a fox's head on a lion's body, with the use of masking and blending. In addition, I used the Clone Stamp tool to polish up the look of the lion's mane and adjusted the Color Correction Tool to the fox's head to have the same palette as the lion.
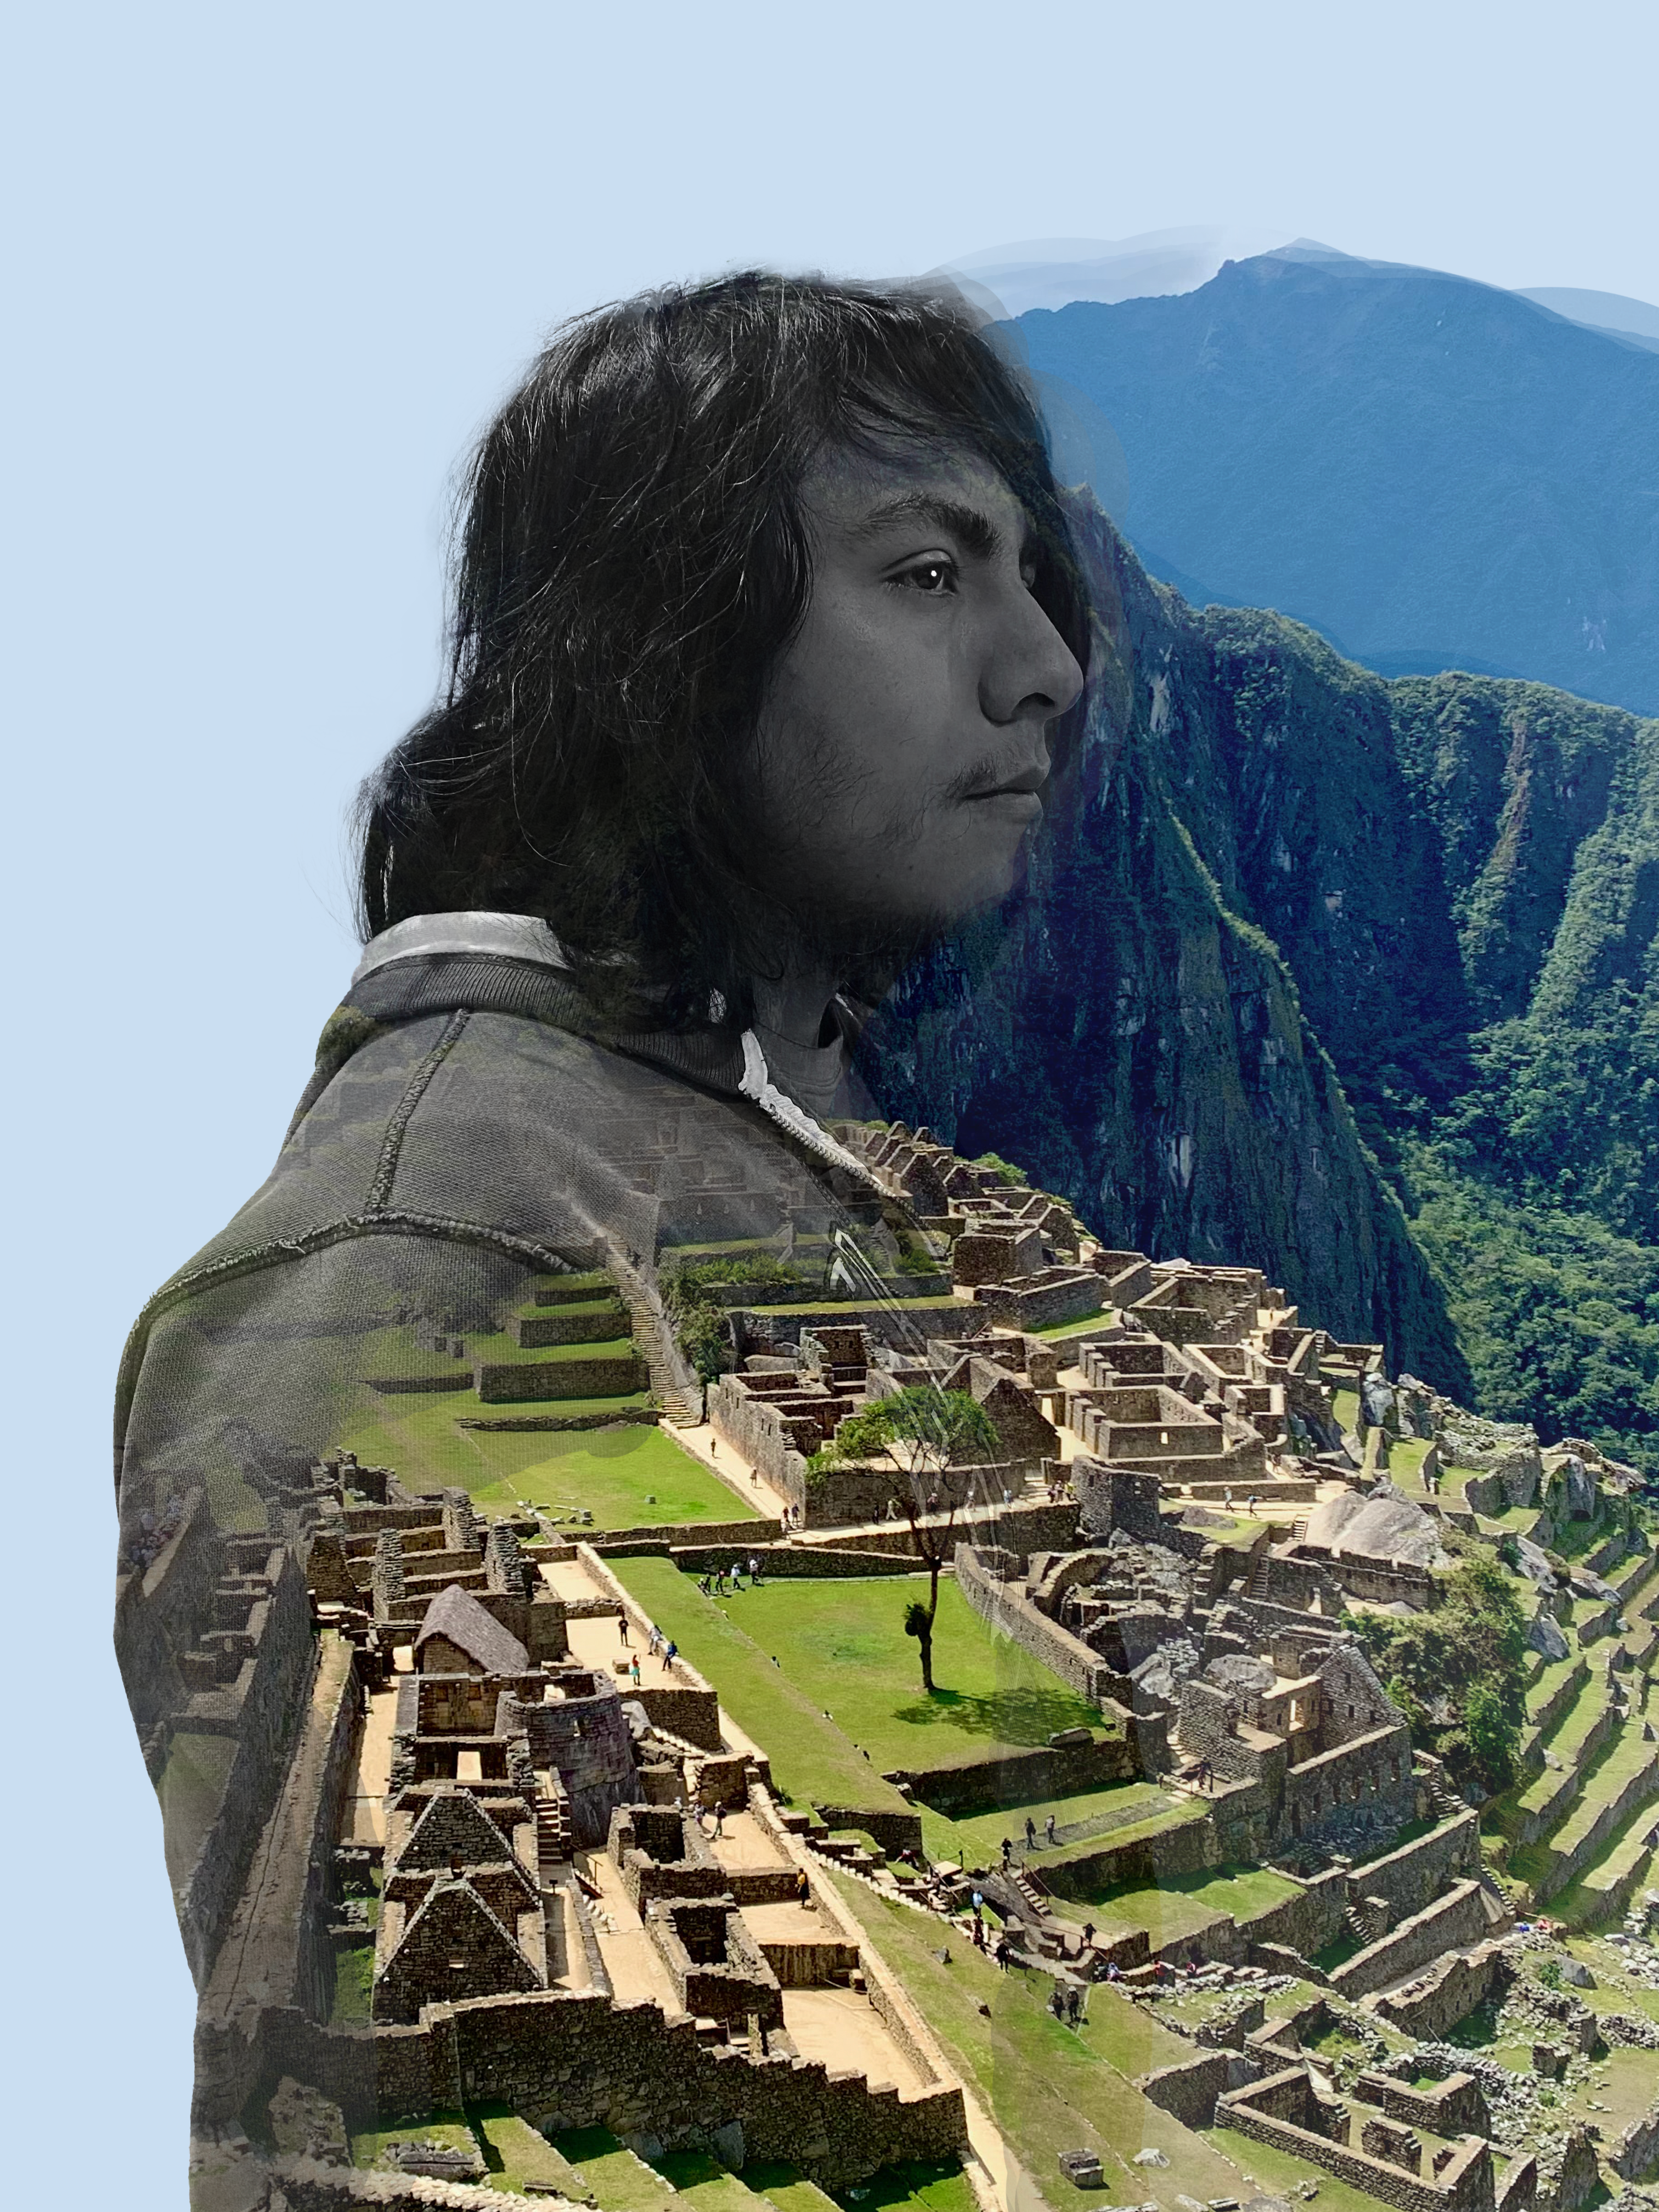
Double Exposure
Using two photos, I created a double exposure image. I used an image of myself, and an image of Machu Picchu to combine together with the use of selection and masks.
Double Exposure Cinemagraph
Continuing off the Double Exposure assignment, this time I was tasked with combining a photo with a video this time. Using a photo model example, I placed her and adjusted the hue/saturation and curves to light her body up to blend in with a video an ocean moving waves around.
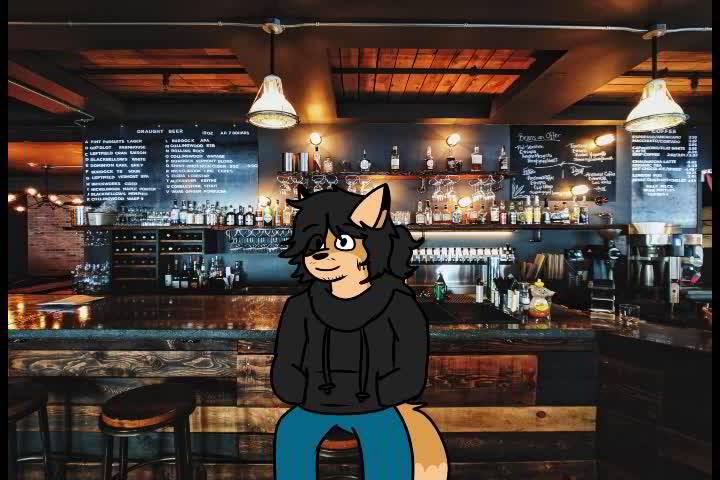
AR Animated Clip
This week, I made an animated clip from Photoshop, and using Artivive, I turned it into an AR experience! I added some drawings of a character of mine sitting in a Bar location, blinking and looking at a bottle sent his way, as he grabs and takes a sip.
If you are using the Artivive app, you can see the video of it play from this screenshot! Just point your camera to the photo from the app, otherwise, click here to see the video itself!